Introduction
Designing a brand new VUI project can be a lot to handle, but taking the right steps to prepare will save you time and effort in designing a usable, useful skill. Designing a skill requires lots and lots of planning, so don’t get discouraged if it takes a few tries to get it right. Conversational devices are still new to the market, and people are still learning how to interact with them.
We have had touch tone prompts for awhile now, and many users seem to treat conversational devices the same way they treat touch tone prompts, but our job as VUI designers is to change that pattern. Our goal is to create human conversations between the user and the device so that you don’t need to learn a device’s language in order to interact with it.
A successful conversational device is something you can set up at your grandmother’s house, and have her use it successfully without any problems, but we just aren’t quite there yet. As digital natives grow up and take over the majority of the market, this will change with time and voice based devices could be as common as smartphones. In the meantime, let’s be disruptors in the design world and create truly conversational devices.
Terminology/Glossary
A good first step in designing a new skill is to familiarize yourself with all the terminology you will hear over and over again. Once you understand the key “buzzwords” used in VUI design, you can have a better grasp on the specifics of what it really takes to develop a useful skill.
Let’s start with the basics. VUI (typically pronounced “voo-ee”) stands for Voice User Interface, which refers to an app that you interact with using your voice, as opposed to clicking or tapping on a phone.
Conversational devices are devices that let you use skills. An example of a conversational device would be Amazon Alexa (also known as Echo), or Google Home. All of these devices use some kind of artificial intelligence (Alexa, Cortana, Google Home) to make them work so they can become helpful smart home devices.
Voice-based apps are called skills, so instead of the “app store,” you have the “skill store.” Skills are downloaded, opened, interacted with, and help users accomplish tasks – just like apps. The only difference is the terminology – you call it a skill instead of an app, simply because you use your voice as the primary mode of interaction.
Utterances are things that people say in response to a prompt. For example, the system may ask the user “Would you like to learn more?” The user can respond with a variety of answers, such as “Yeah, sure,” “Okay,” “Yes please,” “Not right now,” or even “What?”
Keep this in mind when coding in your utterances, since there are countless ways people can respond to any question. This is something that you can manually do in the development of a skill, so you want to try and think of all the different ways people can respond to these different prompts, and include them in your skill.
There are two good ways to build a comprehensive list of utterances. One way is tracking what people actually say in response to your prompts, so you can continually add in these utterances as you learn new ways for them to respond. Another way is to conduct user testing to find out how people generally refer to their answers for each question. We’ll dive deeper into the user testing method later.
Now that we’ve nailed down the basic terminology, let’s discuss how people utilize skills.
How do people use skills?
If you take away one thing from this article, understand that voice user interfaces should be conversational. A skill provides a conversation between humans and machines, and it is our job to ensure this conversation sounds more human than robotic. Our goal is to design an interface that is intuitive, and for voice-based apps that means your skill needs to have a successful conversation with a human. It doesn’t necessarily have to pass the Turing test, but you want to allow for natural human conversation as much as possible.
This is a new age with so much technology at our fingertips that there are no more excuses for poor voice based interfaces and awkward or unhelpful interactions with chat bots. With the rise of digital natives, conversational devices are going to become more popular and more common, so there’s no better time than now to jump on the skill bandwagon if you do it right!
Skills are best suited for short tasks that only require a few brief steps. Make sure that whatever you design your skill to do can be done without referencing information on a screen. This can be a hard thing to remember at first, but if you continually revisit this fact, you will stay on the right track to designing a practical skill. Examples of some simple tasks suited for skills includes things like checking on traffic, listening to the daily news update, checking your bank balance, making a bill payment, or playing music.
Remember that skills are not intended to replace your website or mobile app – they are simply a different medium in which users can interact with your brand. Users do not have the expectation for a skill to be a fully-encompassing piece of software. They expect to only accomplish simple tasks through voice interfaces, so let’s stay in their comfort zone so we can meet their expectations. A limited skill that does its job well is much more valuable than a robust skill that is clunky and difficult to use.
Now that we know a bit more about what tasks are best suited for skills, let’s get to the planning.
Ideation
First off, you need to figure out details and really think through the process. Ideation is the step where you brainstorm and come up with all your crazy ideas of how the skill could work. Don’t be scared to think up all your pie-in-the-sky ideas. Take your time to explore those as viable options. In the brainstorming phase, there is no such thing as a bad idea, so don’t hold back!
Sometimes when you start brainstorming from scratch, you might experience writer’s block and not know where to start. If you can get a giant whiteboard to draw on, or a wall to put sticky notes on, you can start anywhere. Start with the first idea that pops in your mind, or a catch phrase you want to include, or a flow you think is well thought-out. Start anywhere and build from there. Get colleagues to help you plan it out – remember that two heads are better than one!
Go so far as to write out how the skill will prompt the user, and what they may say in response. Building out flowcharts or user flows is a great way to document this. Take one chunk at a time and build it out. Start by building out the best case scenario, and then slowly build out alternatives to implement edge cases and user errors. Documenting what happens when there is a failure is just as important as what happens when the user says what you want.
That being said, keep in mind that you are designing a skill, not a touch-tone prompt, so please don’t frustrate your users with prompts saying things like, “If you want to check your balance, say Check Balance.” Again, the point of this being a conversational app is that you use human language to solve problems. Avoid using the linguistic equivalent of math formulas since humans aren’t raised knowing that selecting the number 1 is equivalent to “let me speak with the billing department”. Instead, stick to things you would say to another human on the phone.
Back to figuring out error messages, remember that errors need to be useful and provide some kind of context for fixing the user’s problem. For example, if you try to access you account and end up entering the wrong PIN number, don’t just tell the user “An error occurred.” Instead, let them know “That PIN didn’t work, try again.”
At this stage, you will have a LOT of information to work with. Push through this phase with as much effort and information as you can handle, because it will make everything else down the line a lot smoother.
Planning a Skill
Once you figure out what you want the skill to do, start pairing down what you were planning in the ideation phase. Now is a great time to bring in some outside research tactics, like comparing against your competitors, even if they are in a different industry.
By reviewing your competitors, you get to see the R&D that other companies have already done to solve similar problems. Please avoid plagiarism, but it is a good thing to investigate how other companies are accomplishing the same goals as you. Hopefully your competitors (at least ones with well-rated skills) have done all the research you are doing, too! That being said, let’s learn from their mistakes and use that to help us stay ahead of the competition. You can also find out what not to do from your competitors just as easily. So, think outside the box, and use your competition to your advantage.
This may sound like a no-brainer, but remember to double check that your skill’s capabilities are actually useful, and not just requests from higher up the chain. Lots of skills on the market have poor ratings because they solve a problem people don’t really have, or they don’t make solving a problem any easier than calling or going online to do the same thing. Remember that your skill is intended to provide convenience for quick tasks. Think about when you text someone instead of calling them – usually you expect a quick answer for one thing. The same concept is true for skills. If it’s not worth the trouble to get on your computer and sign in to do a simple task, that may be a good candidate for what your skill can do.
Since your skill is a way for customers to interact with your brand, make sure it still matches any brand guidelines you may have. Skills have personalities in a way, so make sure your skill’s personality matches your intentions. You especially want to assess the tone of your skill. You want to help build trust with your users by ensuring them that you take their information seriously, especially if you are gathering sensitive information. On the other hand, you want to be friendly and inviting if your skill is intended to brighten someone’s day. A bank will have a very different tone than a kid’s game, and setting the right tone can have a huge impact on a good first impression.
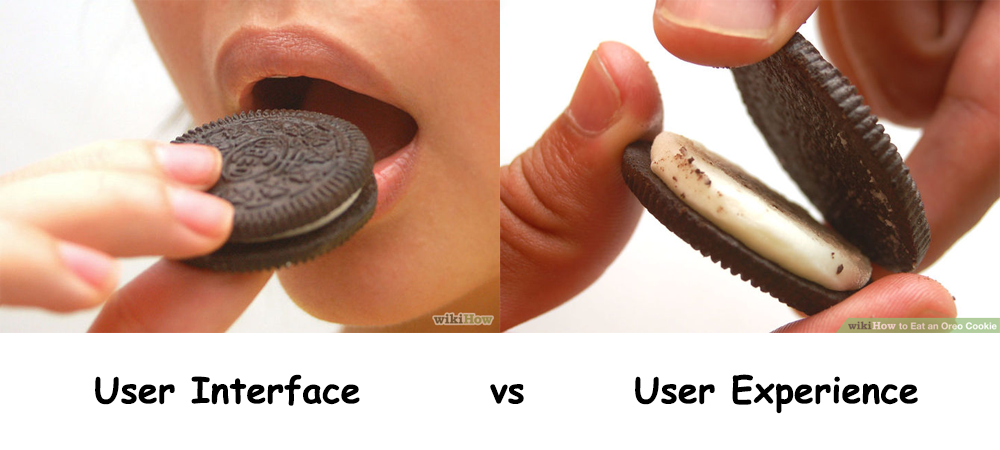
User Experience
Once you know what you’re doing, and how you will accomplish it, now is the time to go in and fine tune it to make sure the skill is useful and usable. Remember that your skill is only successful if your users think it is useful. User ratings will tell you a lot about where your skill may be falling short, or what you are doing well, so pay attention to the skill store ratings to continually improve what you have.
If you have an existing digital product, review analytics or logs to identify common things people do with your site or product. This will help you verify that you’ve selected appropriate tasks to use for your skill, and gives you a place to start. Cross-check your analytics with the ideas you have in mind for building your skill to make sure they align. If you want to build something that not a lot of people use, it may not be worth the effort to actually implement that feature. Put your users first when selecting which features to implement.
In addition, make sure the tasks you choose are simple and have minimal steps. Think back to our analogy of when to send a text message versus a phone call, and keep that in mind for each feature your skill will offer. Typically you only want to use voice interactions for things that have one or two steps in its process, not something really long like filling out a form for a car quote, or ordering a week’s worth of groceries. User testing will give you a better idea of how easy or difficult a task will be to complete.
There is a lot you can do with user testing. Even if you don’t have a bunch of smarthome devices to test with, you can still do user testing! It’s very unlikely to have a fully functioning skill during these test phases anyway, and you’re lucky to even have a functioning prototype. If you don’t have your skill built out, you can test with free online tools like Echosim, which lets you type words (and use punctuation and other key words to get the right inflection) and the computer will read it back to you in Amazon Alexa’s voice. This is great way to fake testing an Amazon skill.
Speaking about utterances, let’s talk more about how you can use user testing to build your list of additional utterances. You can work with your users and do low-fidelity testing, where you have a script written down with common commands, and you can have your moderator act like the skill and read back relevant phrases to the user.
One great thing about this type of testing is how humans tend to act in a simulation like this – it will seem very informal, and maybe even slightly awkward, which can play to your advantage. Many users will inherently try to speak to you instead of the skill if they have problems, which is a great way to see how they try to accomplish these tasks conversationally. Take advantage of these conversations, and even things users may say when they are “out of character,” to help improve your skill with a longer list of utterances, or even changing up the flow of how the user will complete a task.
If possible, try out user testing with a variety of experience levels, such as people who have never used Amazon’s Alexa, Microsoft’s Cortana, or Google Home, as well as people who use these products regularly. That way, you are asking both novice and veteran users how they respond to your prompts, so that you can account for both types of users. You may even be surprised to see some overlap amongst the different groups!
Development & Quality Assurance
Now we’ve gone back and forth a few times trying to fine tune requirements for a new skill. This step is where it is best to finalize your requirements and specifications for what the skill does, and how it does that. If you’re able to finish all this planning and go to your development team with your ideas, utterances, and user flows already documented, the development process will be extremely easy.
At this point, it’s time to take a step back and review what’s been done so far. Make sure that everything you have makes sense. The user experience helps out with this a lot, but take a 1,000 foot view and make sure things work. After so much fine tuning, it’s easy for simple things to stop making sense once you put them back together into a flow.
Quality assurance testing helps to fine-tune any problems or bugs. When conducting QA on your skill, try to break what was coded to make sure it was built to be robust with appropriate error messages and alternatives built in to help guide the user to complete their task. This is your last line of defense for trying to find bugs, so really try to break what you have to see what happens, and fix any problems you encounter. Don’t be scared to test out edge cases, and test what to do if the systems fails – either an error occurring, or the system not being able to understand the user, or what the user may do if they don’t have the right information. Keep in mind that you don’t want users to ever get stuck in a flow. Always give them a way out!
Don’t be fooled, QA can happen much earlier in the process as well. You don’t need to wait to have a fully functioning skill in order to start QA testing. You can start by walking through your requirements like a flowchart, documenting different situations you decided to test, and what the different outcomes were. This can all be done manually on paper – you don’t need any fancy equipment or technical skills to start testing like this. However, you want to have multiple people help out with QA since you will be so familiar with the skill you may be blind to some of its faults.
However, note that you still have humans coding out your skill, and you will likely need to do another round of QA just to double check that everything still works. Try building out a test plan to follow throughout so you can conduct multiple rounds of QA, and have some benchmarks to test against. However, be sure to include those edge cases we mentioned before in your test plan. If you only test for the optimal result, you are guaranteed to have users finding your errors instead. Users who find errors are unhappy and may leave a bad review, so don’t forget to conduct a thorough quality assurance audit before making your skill publicly available.
Advertising
Now that you have your product, you need to get the word out there. In your advertising, you want to keep two things in mind more than anything – let the world know about your skill, and explain how to use it. Skills don’t really come with a user guide beyond the description in the skill store, so help out your users by explaining the main use cases. Consider giving them examples of what they can say, and how the skill might respond.
An outside-the-box way to advertise is to give beta access to your skill to help promote it. We previously mentioned that users may find bugs in the skill, which we want to avoid, unless we decide to specifically ask for their help. If this is your first skill and you seem a little unsure of what you are doing, or if you have a really engaged user base, you can consider releasing your skill as a beta version and encourage feedback from your users.
Every user who downloads your skill can potentially spread the word to their friends, especially if they feel like they have a stake in its development. That being said, if you are able to, consider compensating your users for their time and effort in doing free QA testing for you. You could do this by mailing them swag like stickers, temporarily unlocking a paid feature of your product in exchange for their feedback, promising them access to the latest features you release down the road, or acknowledging their time and efforts online on a thank-you page (only if they opt-in to share their information!). If your users willingly sign up to use an incomplete or beta skill, they are actively engaging with your brand and will be more likely to spread the word about your skill, which gives you free advertising. Even small-scale advertising like this can be very beneficial.
Not everyone will be able to do this – if your company is more conservative, it may seem inappropriate to put out a beta skill. If your skill deals with money and transactions, you may not want to put something out there that could risk losing your customer’s money. However if your skill is something more lighthearted, or doesn’t contain personal data, this may be an interesting option to quickly collect feedback about errors, and to spread the word about your skill.
If you prefer more traditional ways to advertise, your main website is a great place to start. This is the first place you want to have a link to more information about your brand new skill. You can even start advertising ahead of time, as long as you know for sure what your skill’s capabilities are.
Wherever you advertise, include what your skill is called so they can find it, what it does, and how to use it. Even a one-paragraph description (like the one you will need to submit to Amazon, Microsoft, or Google) is enough to get your users started, so put thought into your skill’s description before it makes its way to the store.
General Tips
If you take away one thing from this article, remember to keep it conversational. Use that as your motto. Really think through how to make this conversation between your user and your skill feel as human and natural as possible. People aren’t trained to respond in an exact manner to questions, so you need to account for a variety of utterances. Picture what your user would say if they were talking to a human being, not to a robotic prompt.
Along with keeping the skill conversational, remember that human beings are trained in the art of conversation, so you don’t need to tell them what to do. This is not a touch tone phone prompt, so you don’t need to tell users what to say, unless they ask.
If they do ask, you want to always include a “help” option that goes over the main features your skill can accomplish. A user should be able to ask for help at any given time, and be able to return to what they were doing without interruption. If your users encounter errors, try to give them a useful error message that tells them what went wrong, so they can fix it (or not waste time trying in case it’s a problem on your end).
Your goal as a VUI designer is to give users a fast, easy way to accomplish tasks, and provide another medium to interact with your brand. If you put as much thought into designing your skill as you would your website, app, and mailers, your users will thank you with good skill store ratings and continued interactions with your brand.